|
WOOD IS GOOD
|
|
|
Dream on. Utopia is only for those not governed by local authorities
WOOD AS A BUILDING MATERIAL:
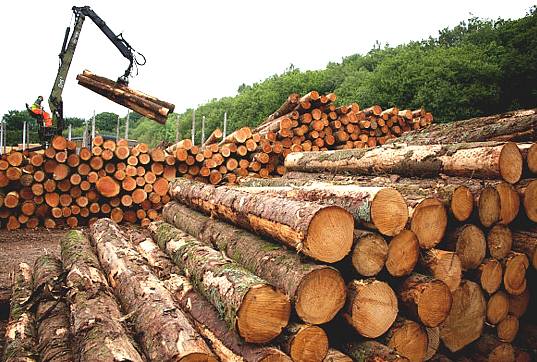
When it comes to sustainability, wood is one of the best materials imaginable - but only if it is grown in properly managed timber estates. The ships of old were built of wood by skilled craftsmen. Carpenters make furniture from wood. Wood is lighter the steel as a structural component but being a natural product is limited in size.
About 45% of the UK's CO2 emissions come from buildings. The Climate Change (Scotland) Act 2009 aims to reduce emissions by at least 80% by 2050. In Scotland, sustainability of buildings is embedded into the building standards. These standards are constantly being increased. The Sullivan Report made recommendations to achieve total-life zero-carbon buildings by 2030.
As the expected operational performance of buildings increase, the environmental impacts of the construction materials used become more significant. These impacts include; the use of raw materials; transportation, the resources used in manufacturing, and the emissions generated. For timber products embodied carbon is an important green credential. For a comparison of materials see the Inventory of Carbon and Energy prepared by Hammond and Jones of the University of Bath.
Timber
captures and locks CO2 up, to a limited extent combating greenhouse gas
build up. While is is growing, forests generate oxygen - and that is why
we cannot afford to lose the Amazonian
Rainforests. Trees absorb carbon dioxide as they grow while simultaneously providing biodiversity rich habitats for wildlife, a variety of ecosystem services and leisure spaces for local communities.
The choice of sustainable materials is not the whole story however. Building design, process and quality are also important determinants of how well the building performs - as is the way in which it is ultimately used.
KEY FACTS
* Timber-frame construction accounts for around 75% of all new homes in Scotland
* It costs around 5% less to build a timber-frame house, and can be built 30% quicker
* A typical timber framed house saves 4 tonnes of CO2 compared to an equivalent brick house
* Timber creates less waste in its production than either brick, plastic, concrete or steel
* Modern timber windows can be designed to last 60 years if properly maintained
* Unlike metals, wood retains its strength in a fire, and doesn't sag, bend or melt
*Using timber in construction improves the sustainability of buildings.
* Opportunities exist for the forest industries in the UK to increase their markets through the use of timber in construction, helping to meet the government targets for reduction of CO2 emissions from buildings
The Forestry Commission in England supports the use of sustainable timber in construction and as a source of renewable energy. This website will allow you to find out more about Forestry Commission projects that use locally grown sustainable timber and about how they promote timber as a renewable and sustainable material.
SUSTAINABLE FOREST MANAGEMENT
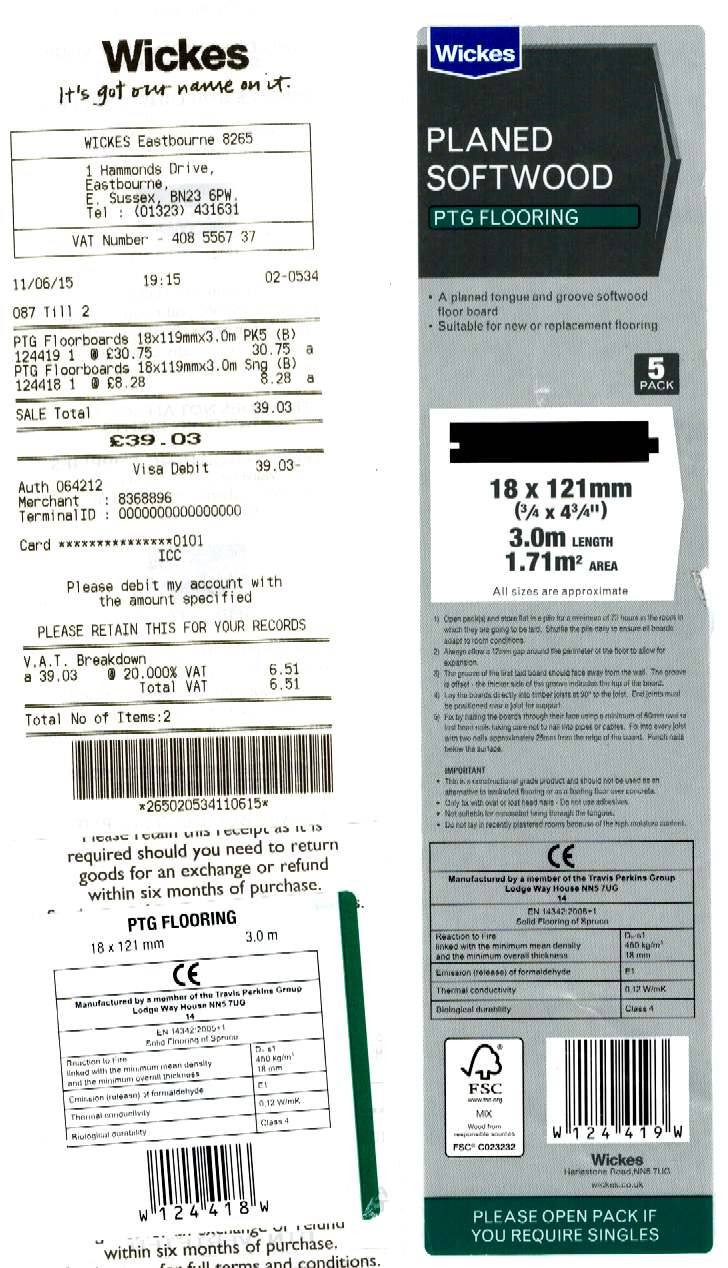
HELPFUL SUPPLIER - Some suppliers would argue tooth and nail that the customer was wrong. Not Wickes. Once a problem was discovered they sorted it with the minimum of fuss.
WOOD FOR STORAGE, EXPANSION & ACCOMMODATION:
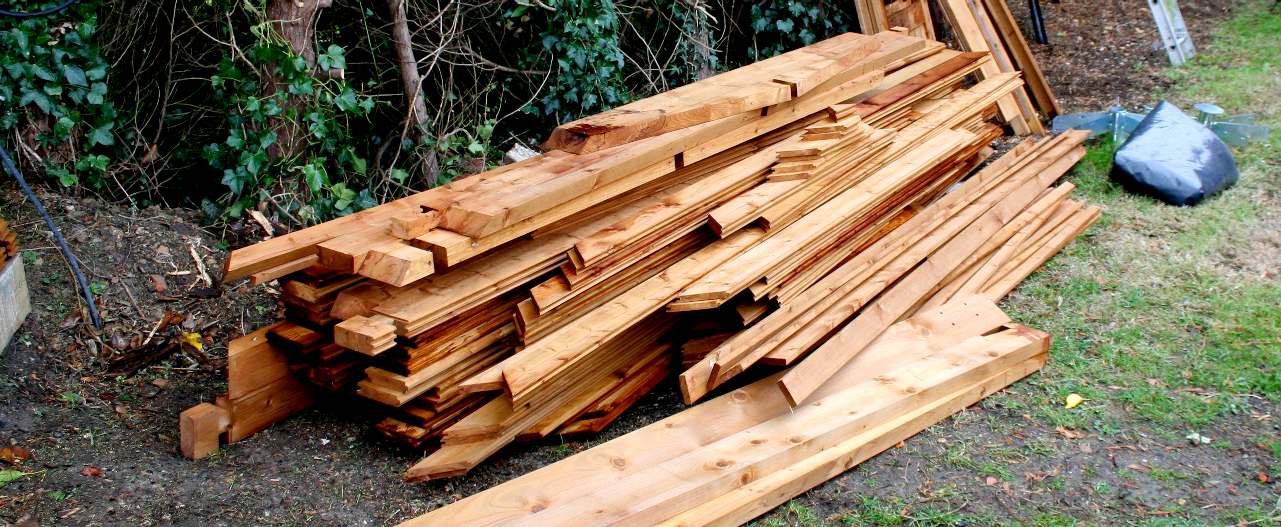
Wood is great for small sheds and larger log cabins and many sizes in between. The construction varies but for log cabins and summer houses sections of wood are machined so that they slot together like a jigsaw puzzle. They arrive on trucks as a flatpack, having been made at a factory. The timbers used are usually treated.
GROUND PREPARATIONS
It is not necessary to dig foundations or lay concrete to install a log cabin. In fact the opposite is true. Generally log cabins are installed over pitch pine posts or brick pillars. What you do need to be sure of is that the levels are correct, or your shed or cabin will lean at an odd angle.
For sheds and the like, most people lay concrete. The preparations for this is simple but requires a bit of elbow grease. The first thing to do is to decide where you want your cabin. It must have at least 1 meter clearance from a boundary, tree or other building.
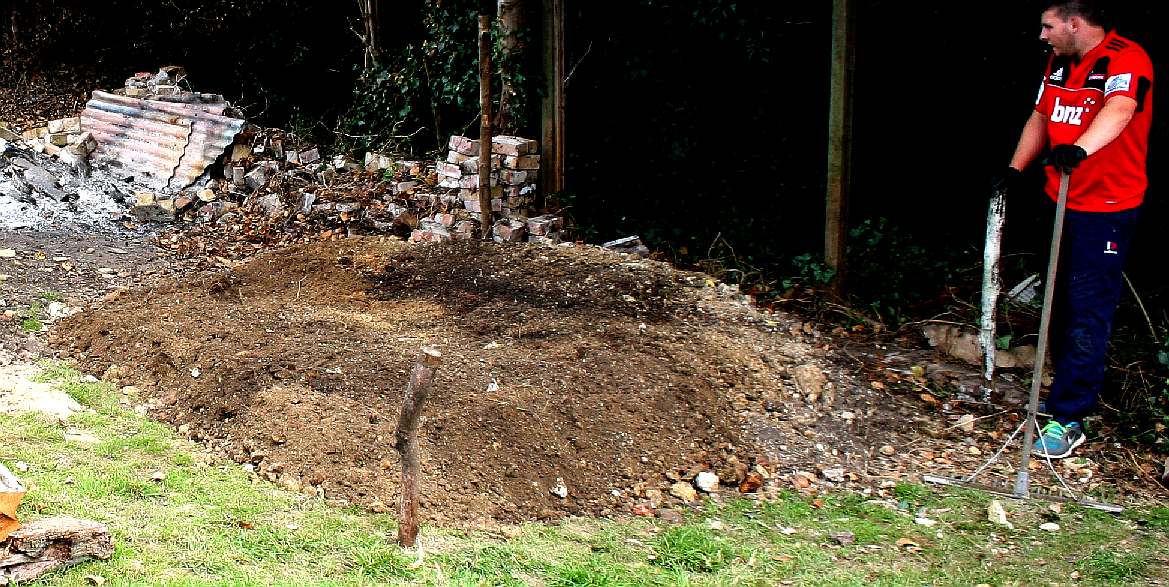
LOCATION - Choose your site carefully. Pegs are a good visual indicator to work to when doing the initial leveling. In this case there was a slope and we had to cut into the hillside to even things out without the need for a digger. Copyright photographs © 11 August 2016. All rights reserved. You will need the permission of Cherry Homes to use these pictures except for private study, research or educational use.
GROUND RAKE - Using a shovel and a wide cast aluminium rake with deep tangs, level out the site. Copyright photographs © 16 August 2016. All rights reserved. You will need the permission of Cherry Homes to use these pictures except for private study, research or educational use.
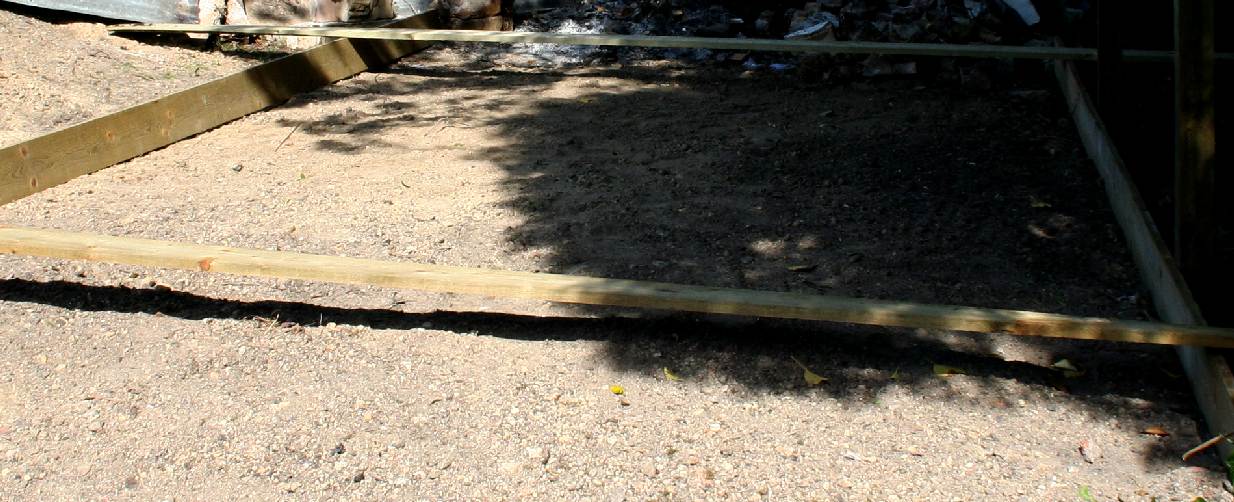
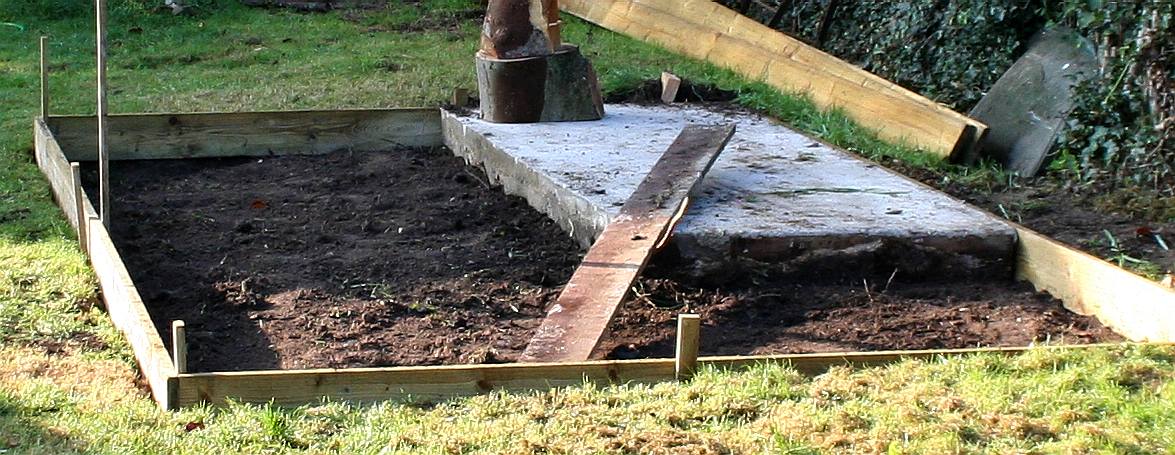
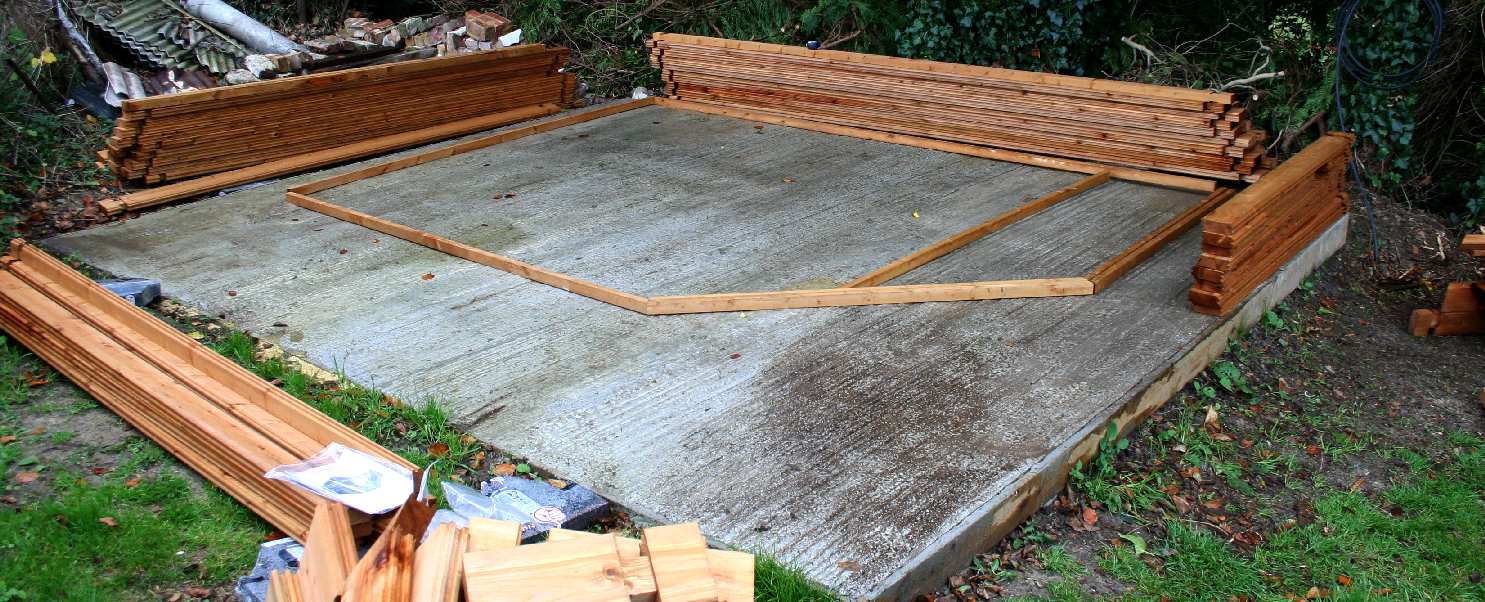
FRAME - When pouring concrete it is a good idea to shutter the edges to contain the pour. As this is only temporary, rough sawn timbers can be used. Peg the corners of the area accurately this time and be sure to use a spirit level to get the frame level. Take diagonal measurements from corner to corner that should be within a 5mm (1/4") of each other, if the frame is square. Copyright photographs © 16 August 2016. All rights reserved. You will need the permission of Cherry Homes to use these pictures except for private study, research or educational use.
SHUTTERING - The pegged and shuttered area should look something like this. Note that one side is set into the bank, while the other side is proud. The frame though is level. Not much is level in nature, except desert salt flats, like that at Bonneville in Utah, USA. Copyright photographs © 23 October 2016. All rights reserved. You will need the permission of Cherry Homes to use these pictures except for private study, research or educational use.
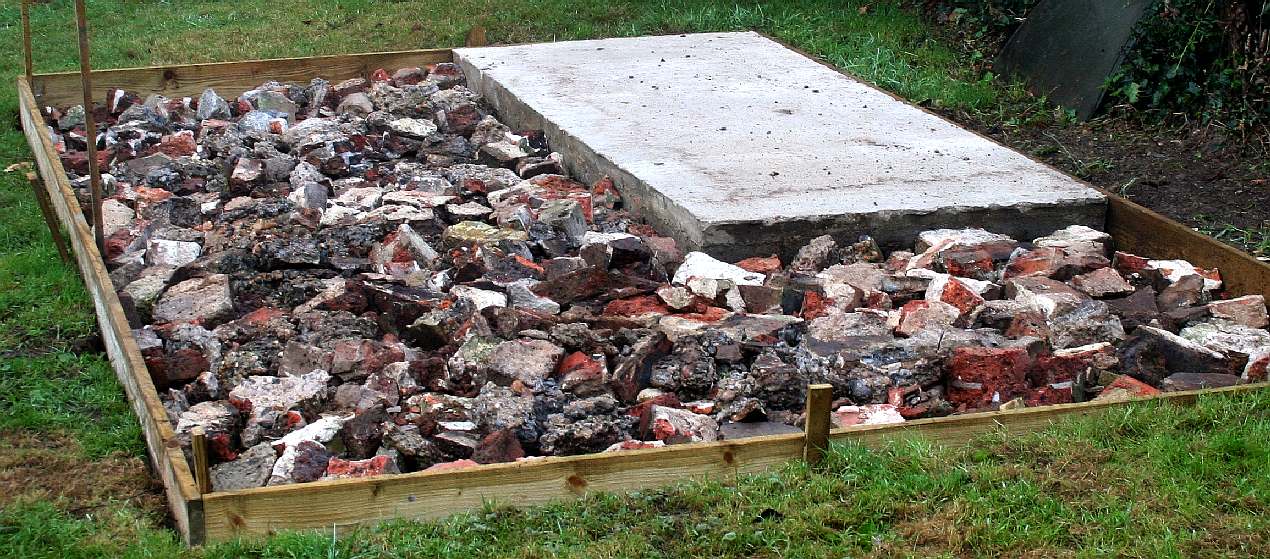
HARDCORE - Ram in bricks and broken concrete using a sledge hammer to break up chunks that are too large. Ideally, this should be to a depth of 150mm (6"). Make sure that there is at least 75-100mm of air above the rammed hardcore to achieve a sensible concrete depth for strength. This picture is a good example of what you should be aiming for. Wet the hardcore with a hose (we used a water-jet) to wash off any loose earth and prime the hardcore. This way the concrete will stick to the hardcore for a solid bond. Make the concrete mix relatively sloppy so that it fills the gaps. Copyright photographs © October 2016. All rights reserved. You will need the permission of Cherry Homes to use these pictures except for private study, research or educational use.
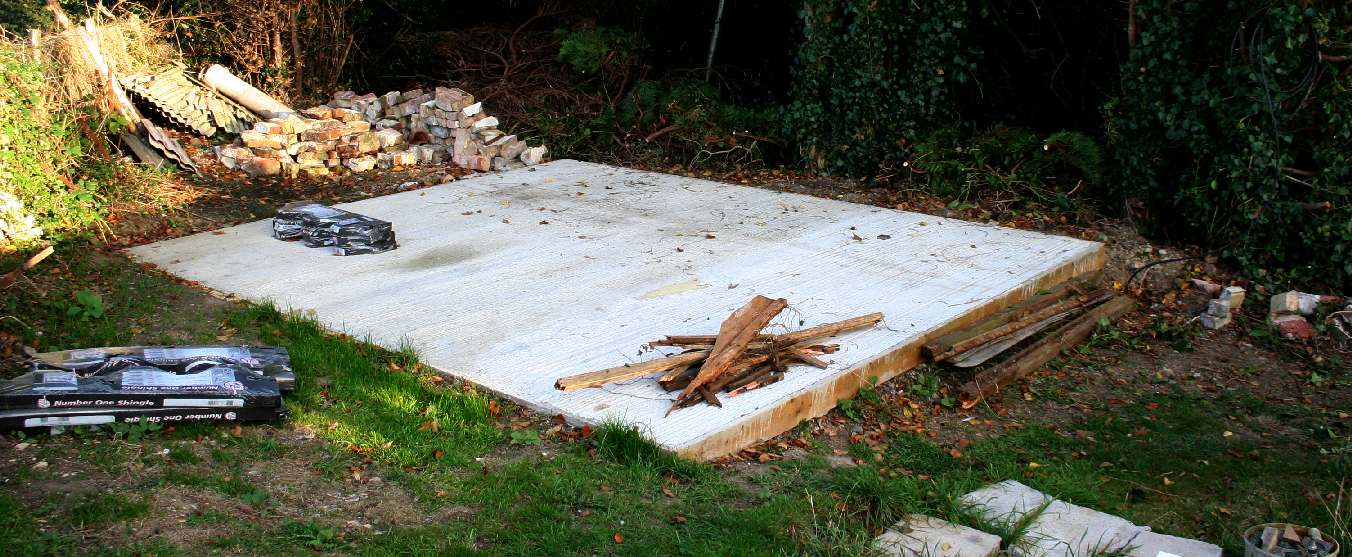
ON THE LEVEL - As you pour your concrete, tamp the mix with a long straight piece of wood. This not only works the concrete into the hardcore, but also levels it using the shutter sides as the guide. Copyright photographs © 26 October 2016. All rights reserved. You will need the permission of Cherry Homes to use these pictures except for private study, research or educational use.
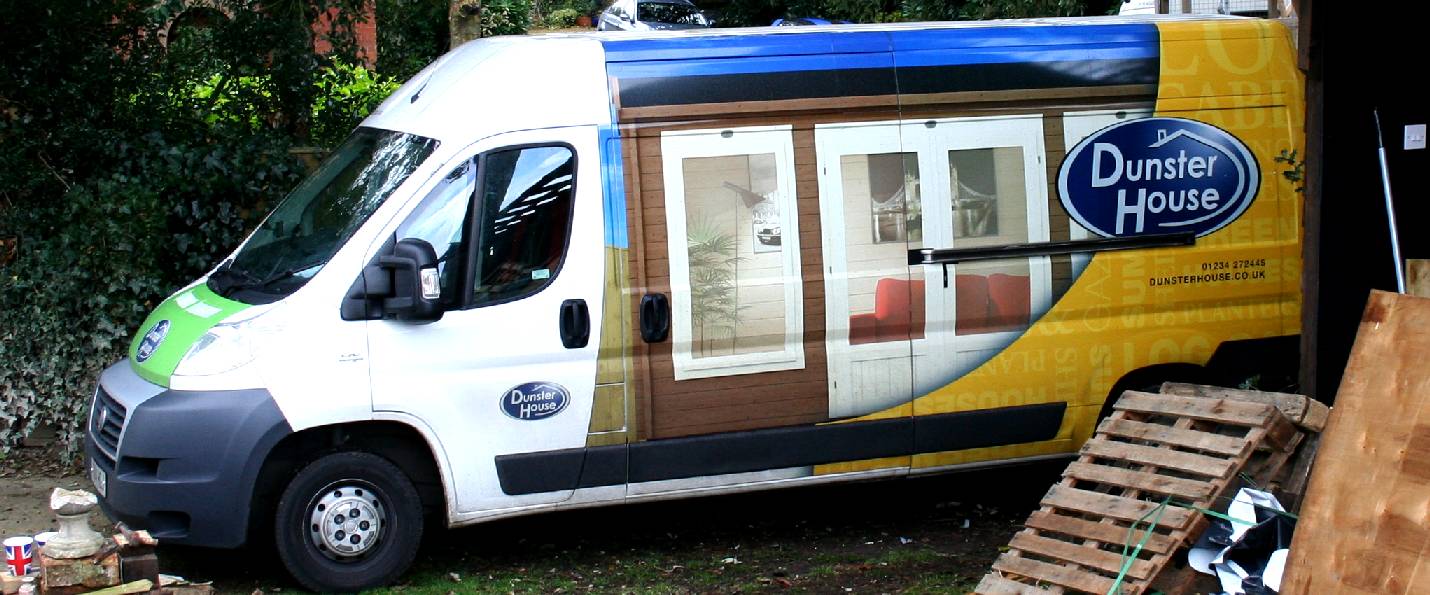
FLATPACKS - Sheds, summerhouses and log cabins are usually delivered on flat-bed lorries. Dunster House supplied a nicely turned out summerhouse for use as a high security garden tool shed in this case. Copyright photographs © 15 November 2016. All rights reserved. You will need the permission of Cherry Homes to use these pictures except for private study, research or educational use.
FIXING TEAMS - Dunster House supply and fit their products. Their friendly teams work efficiently to install your shed or log cabin in a couple of days. We did have a slight hitch in that on the agreed day for delivery and installation, the factory had sent the wrong roof pack. This put us behind waiting for another slot. Copyright photographs © 15 November 2016. All rights reserved. You will need the permission of Cherry Homes to use these pictures except for private study, research or educational use.
UNPACKING - The pallets of wooden parts are unpacked and carried to the site. Four men (including the truck driver) helped with this. Copyright photographs © 15 November 2016. All rights reserved. You will need the permission of Cherry Homes to use these pictures except for private study, research or educational use.
SURVEY - The first thing that the fitters did was to check that the concrete base was level enough. After that, the exact positioning of shed was decided. This one had corner French style doors. Access would be needed from the bank above and the garden below. The corner doors made this possible and attractive at the same time. Copyright photographs © 15 November 2016. All rights reserved. You will need the permission of Cherry Homes to use these pictures except for private study, research or educational use.
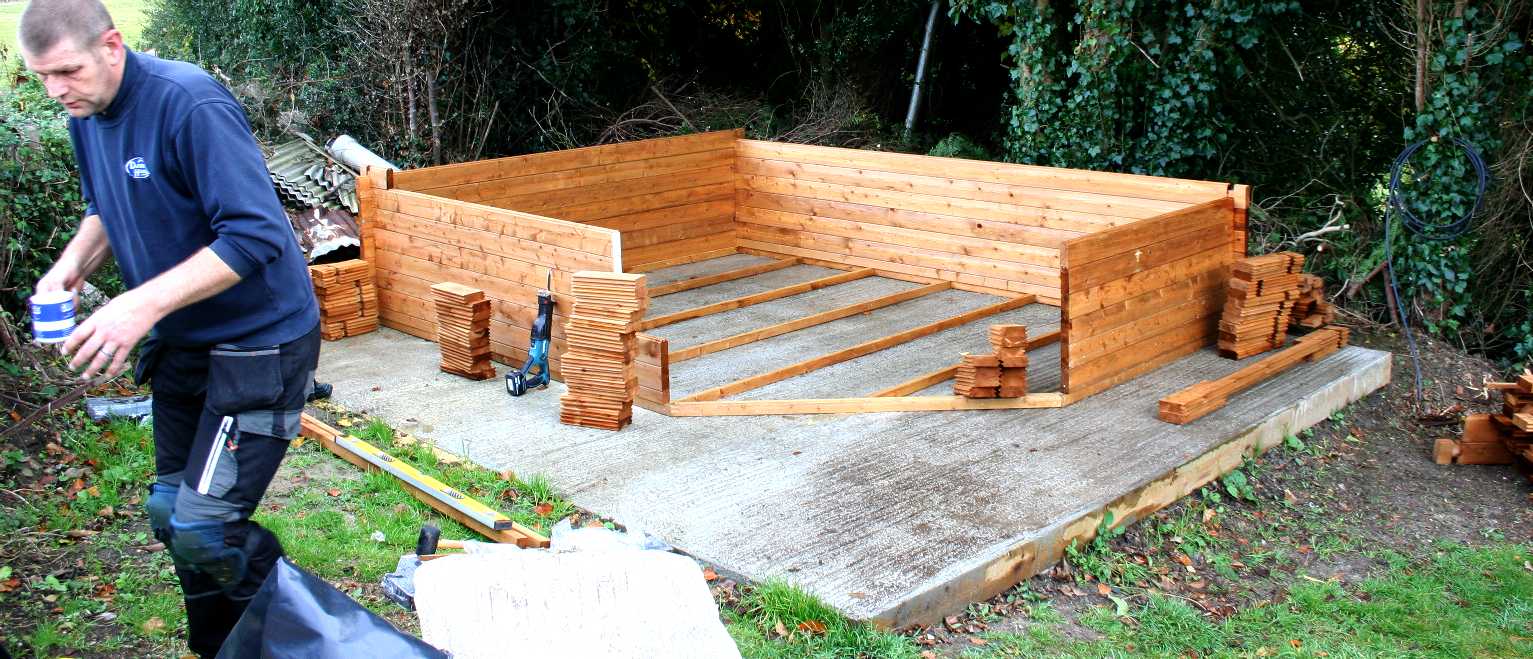
WALLS - The floor support timbers are laid on the concrete base without any damp proof course. We would have preferred some kind of DPC protection. There was some misunderstanding on this point, where when asked about putting in a DPC, the fitters said there would be one, when in fact they were talking about the roofing tiles. Copyright photographs © 15 November 2016. All rights reserved. You will need the permission of Cherry Homes to use these pictures except for private study, research or educational use.
NO DPC? - Where the walls were already some way constructed by the time the lack of DPC had been discovered, the site manager quickly spray treated the floor timbers with an extra coat of preservative - making sure to get underneath and soak the wood. This will go some way to remedying the omission, but it turns out that most sheds are not installed with a DPC. The 10 year guarantee could be extended considerably if a DPC was included as standard. We would recommend a second coat of timber treatment to the whole of the exterior, even though they were supplied pressure treated. This will extend the life of your shed or summerhouse considerably. Copyright photographs © 15 November 2016. All rights reserved. You will need the permission of Cherry Homes to use these pictures except for private study, research or educational use.
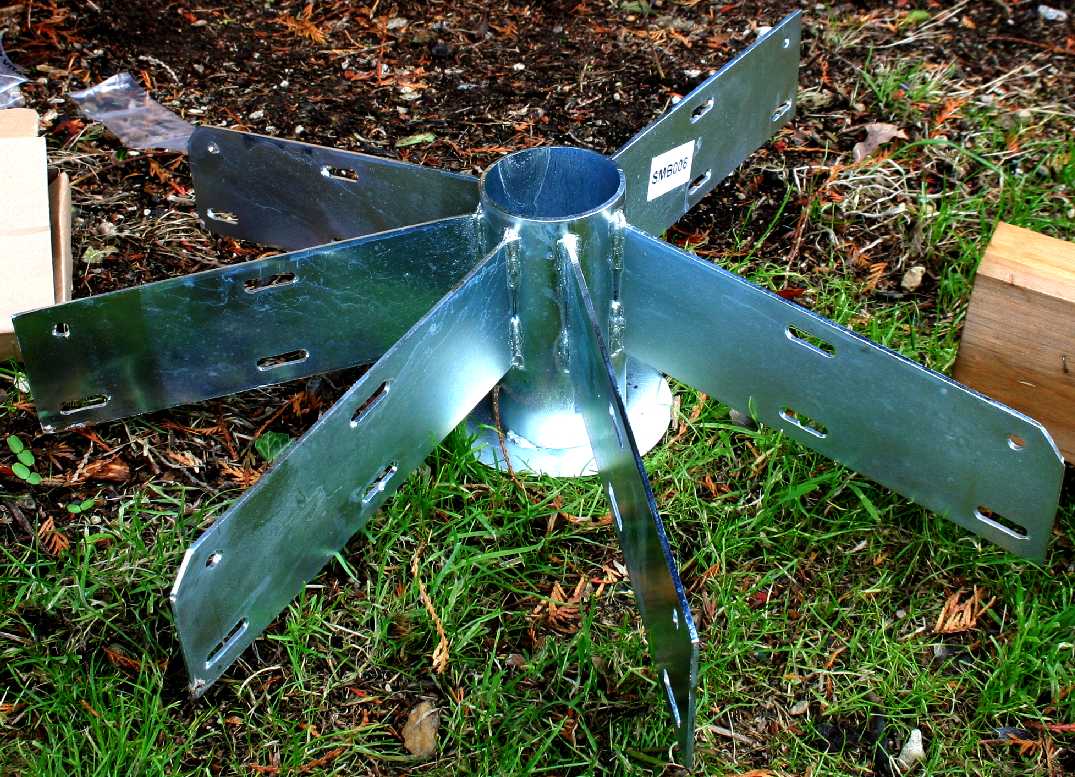
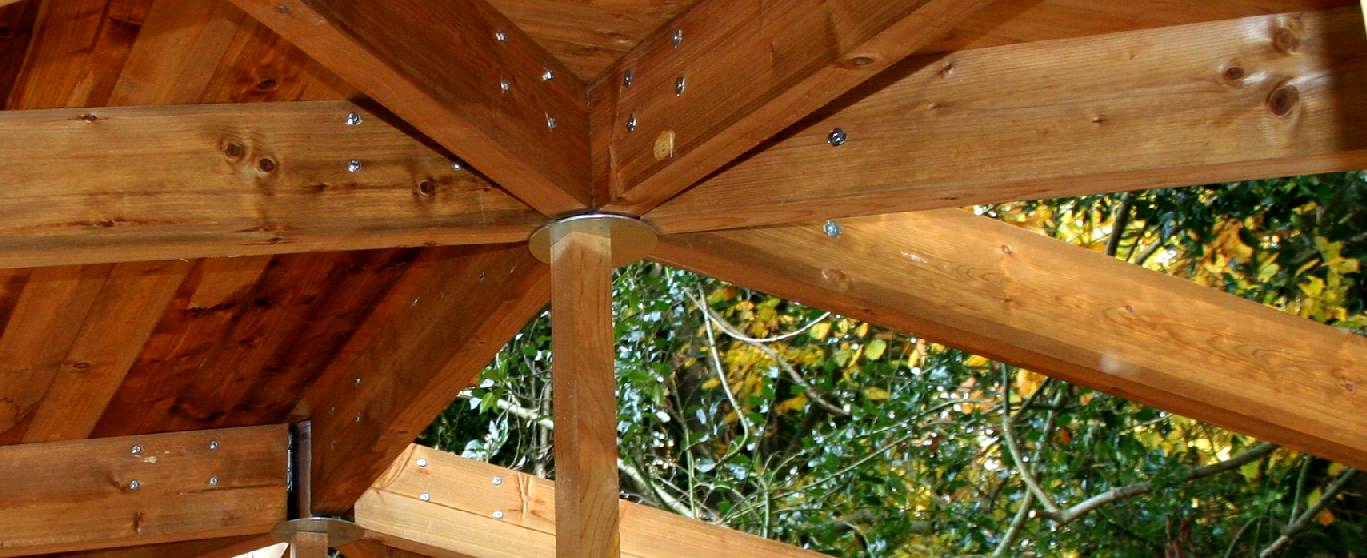
GALVANIZED STEEL - Two of these steel truss supports are needed with a complicated pitched roof. They are welded and protected from rusting with a zinc coating that is applied by hot dipping. Copyright photographs © 15 November 2016. All rights reserved. You will need the permission of Cherry Homes to use these pictures except for private study, research or educational use.
TRUSS ASSEMBLY - The roof beams have a slot machined into them where they meet with the steel truss crown. The beams are bolted to the crown with captive nuts that dig into the timber to stop them spinning while tightening. Copyright photographs © 15 November 2016. All rights reserved. You will need the permission of Cherry Homes to use these pictures except for private study, research or educational use.
ROOF BEAMS - This what the crowns look like assembled. There is another beam that joins the two steel spiders. Temporary timber supports are used until the assembly is connected and the rafters locked into place on the wooden walls. Copyright photographs © 15 November 2016. All rights reserved. You will need the permission of Cherry Homes to use these pictures except for private study, research or educational use.
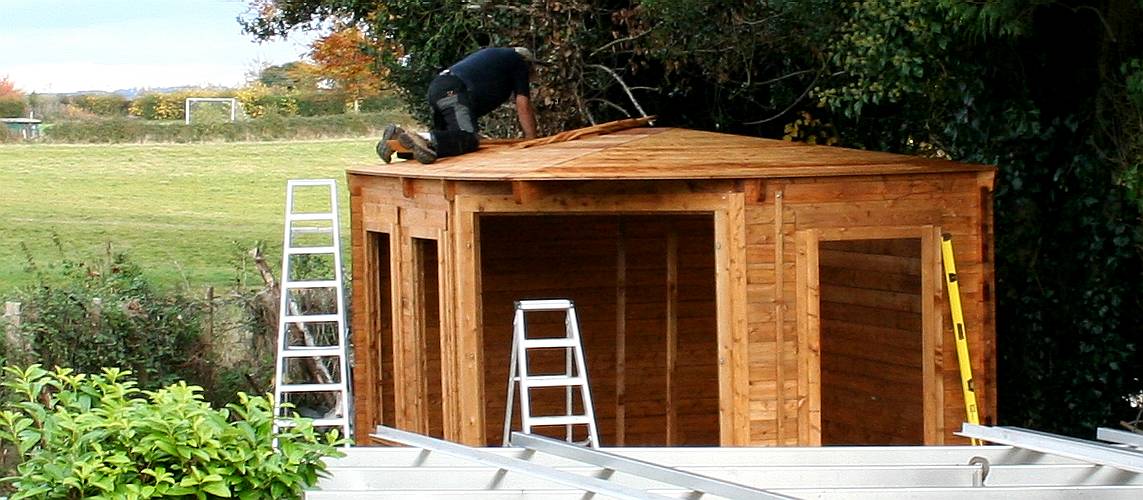
ROOFING - With the roof truss in place, one of the fitters set about putting 22mm planking on the rafters. These planks were nailed in place. The window and door frames are now fitted. Copyright photographs © 15 November 2016. All rights reserved. You will need the permission of Cherry Homes to use these pictures except for private study, research or educational use.
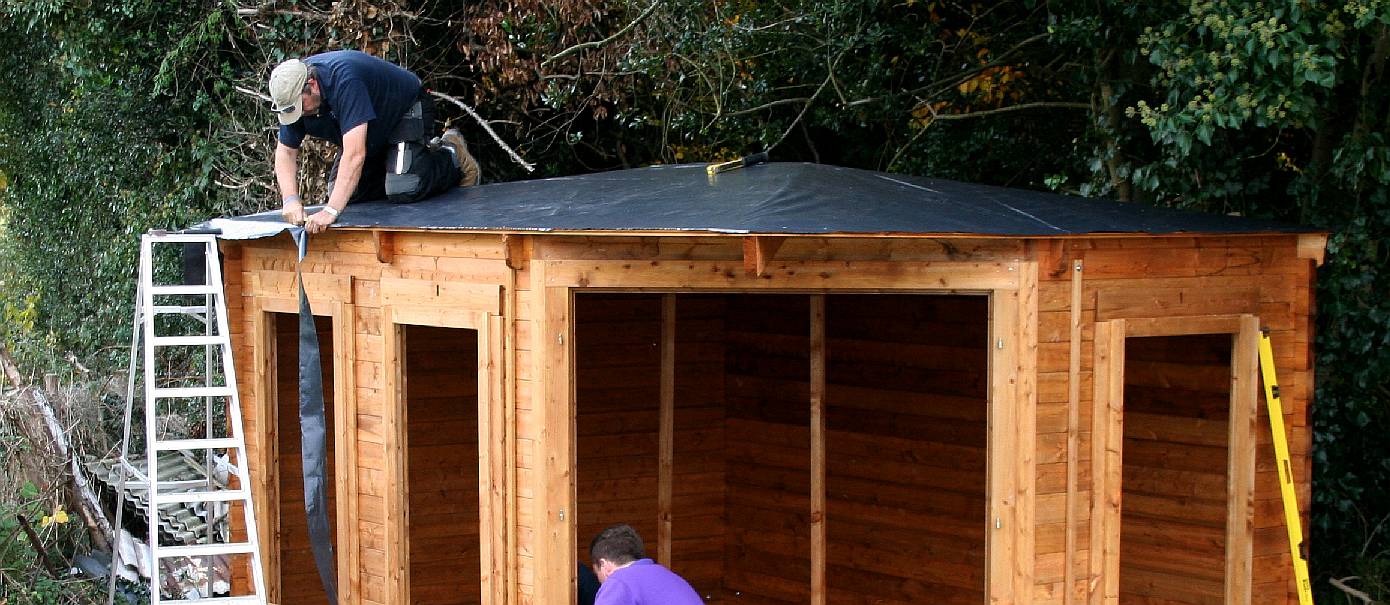
DPC - This is the damp proof membrane that the fitters were talking about, but for the roof not the floor or walls. Copyright photographs © 15 November 2016. All rights reserved. You will need the permission of Cherry Homes to use these pictures except for private study, research or educational use.
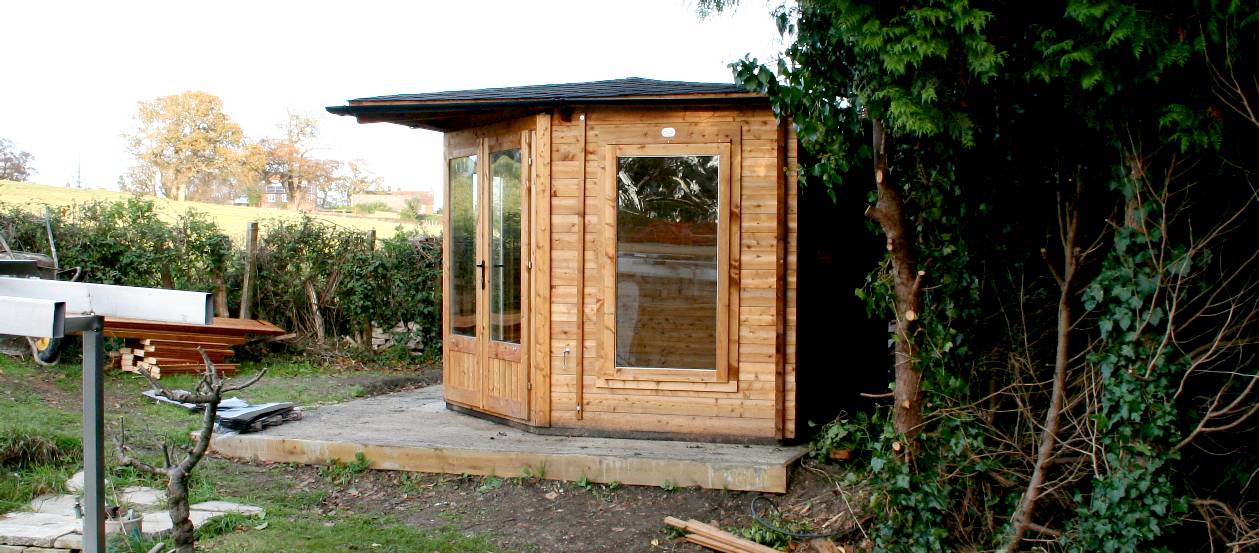
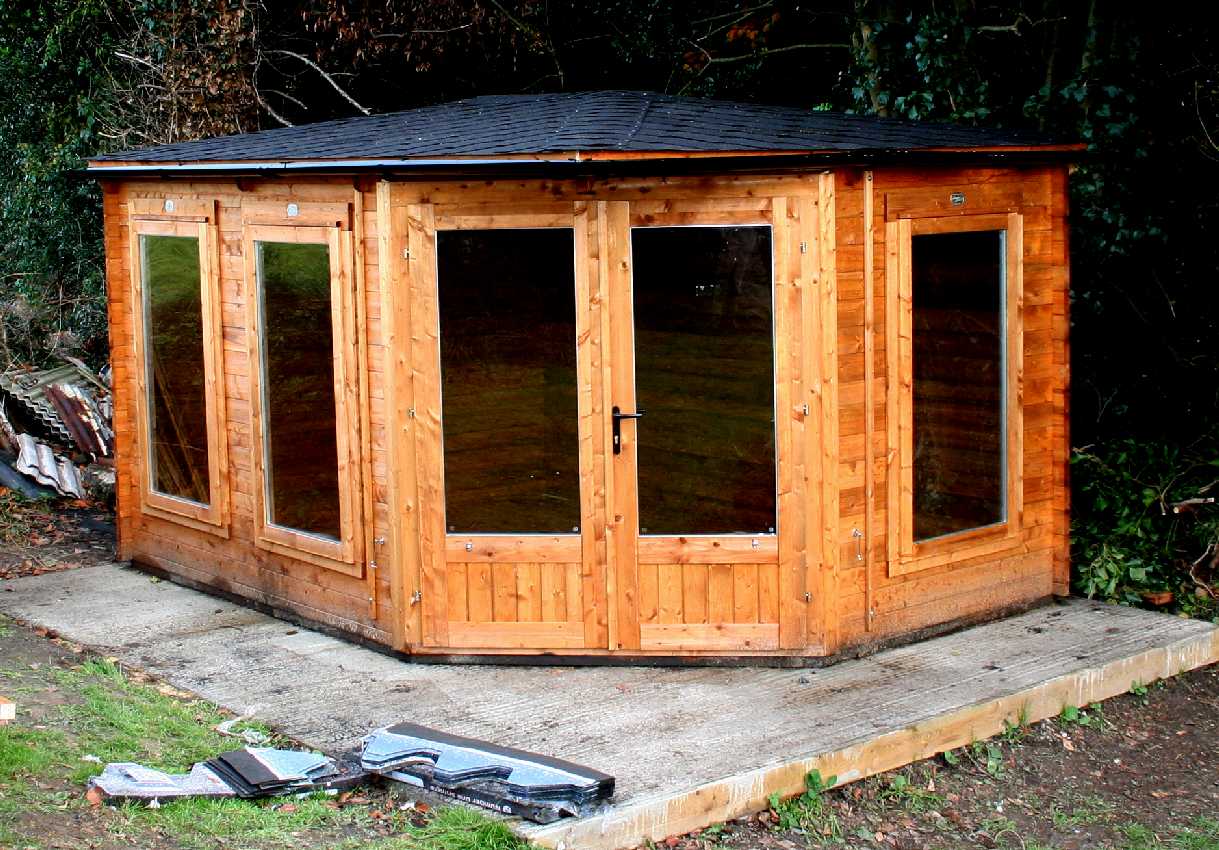
COMPLETED - The doors and windows had the double glazed window units installed and the locks fitted. Guttering feeds water from the roof to two water butts at the rear of the building. Copyright photographs © 16 November 2016. All rights reserved. You will need the permission of Cherry Homes to use these pictures except for private study, research or educational use.
READY FOR USE - Complete and empty (but not for long), and in need of a little landscaping and a site tidy to blend the building into its surroundings. Copyright photographs © 16 November 2016. All rights reserved. You will need the permission of Cherry Homes to use these pictures except for private study, research or educational use.
TABLE REPAIRS
Why buy a new table when you can repair the old one? In this case it was an old folding work table of the kind you might use for wallpaper pasting or for shows. The legs of this table were custom made of angle iron (which is actually steel), welded where needed and screwed to the underside of the softwood planking, but the steel screws had rusted badly and some of the wood was rotten, where it had not been treated.
It was decided to repair this unit with a plywood worktop that would be wider and longer, but also reinforced so that it would be stronger and more stable, with wider wooden feet added (bolted) to the steel legs. This is the build sequence below:-
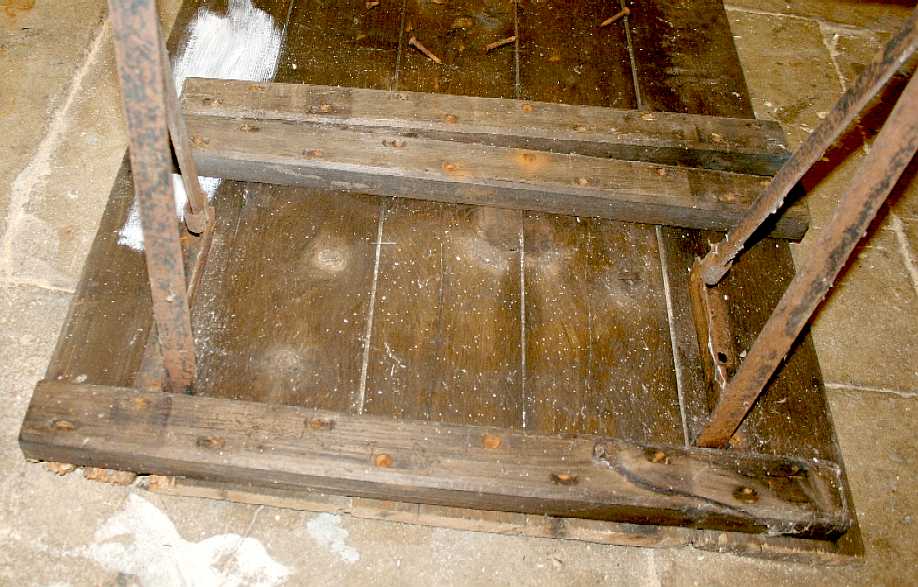
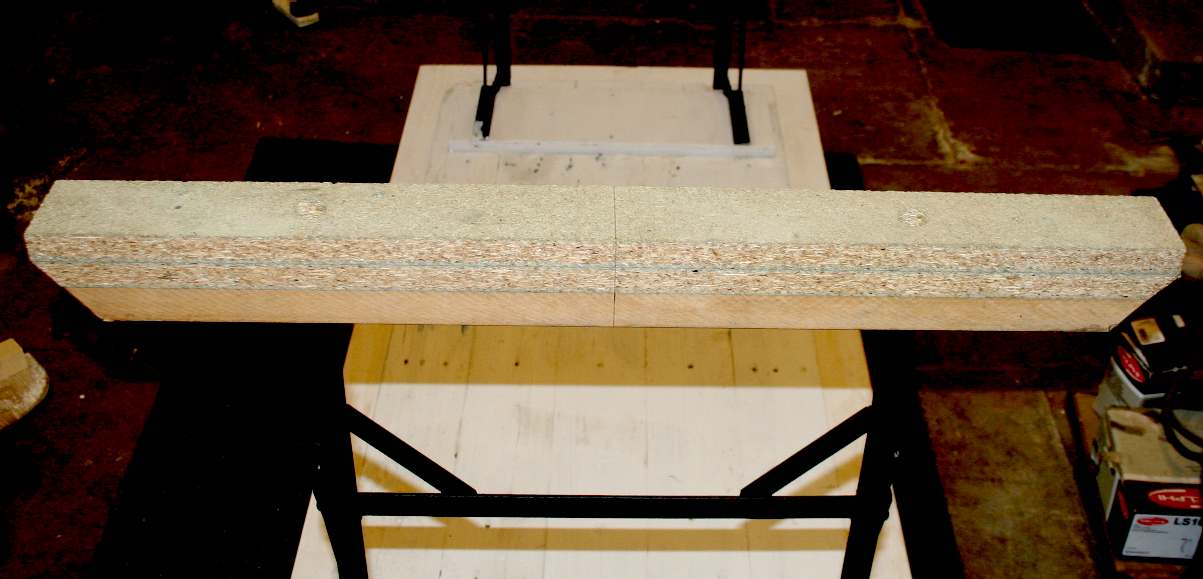
RESTORATION - A handyman needed to repair the ageing table above. The timbers had bowed and had decayed at one end so that it was no longer suitable to work on engineering or building projects. But, it had been a rescue from a shop clearance about 27 years ago, saved from a looming bonfire - so it was doing well. The handyman thought that if he was going to repair the table, he might as well improve on it. It was always a bit too narrow and could do with being a tad longer. The legs appear to be custom blacksmith built in sturdy section steel angle. They looked rusty enough to want to scrap them and start again, but on closer inspection, the rust was surface only and just needed a coat of rust converter, a good paint and some oil on the hinges that had never seen lubrication in their life.
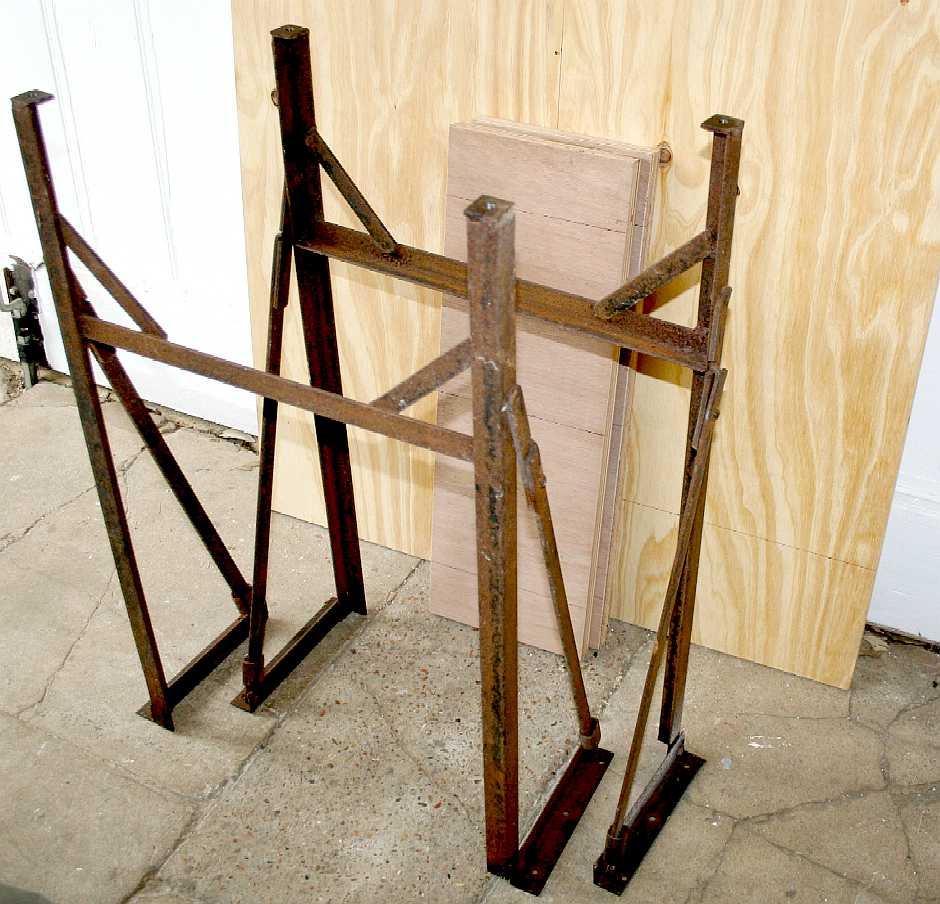
CUTTING PARTS LIST - The table was dismantled carefully. The planks of pine would only be suitable to use as reinforcing because they were badly bowed. They could be turned over so that the bow in the wood could be used to pre-stress a sheet of plywood, making a table very much stronger to carry heavy loads - such as when used for engine rebuilds. You can see in the picture above that the steel legs are not badly corroded. They have six holes drilled in the securing plate (angle iron) that is only 8" (203mm) long. The spruce ply was cut to size: 6' 6" x 32" (982mm x 812mm) leaving a strip 6' 6" x 16" that would be used as a fold-up extension flap, fixed to the top with 5 medium weight steel hinges. You can see two 24mm hardwood ply pads 24" x 8" (610mm x 203mm) in the picture above. The plywood came from Stamco in Eastbourne.
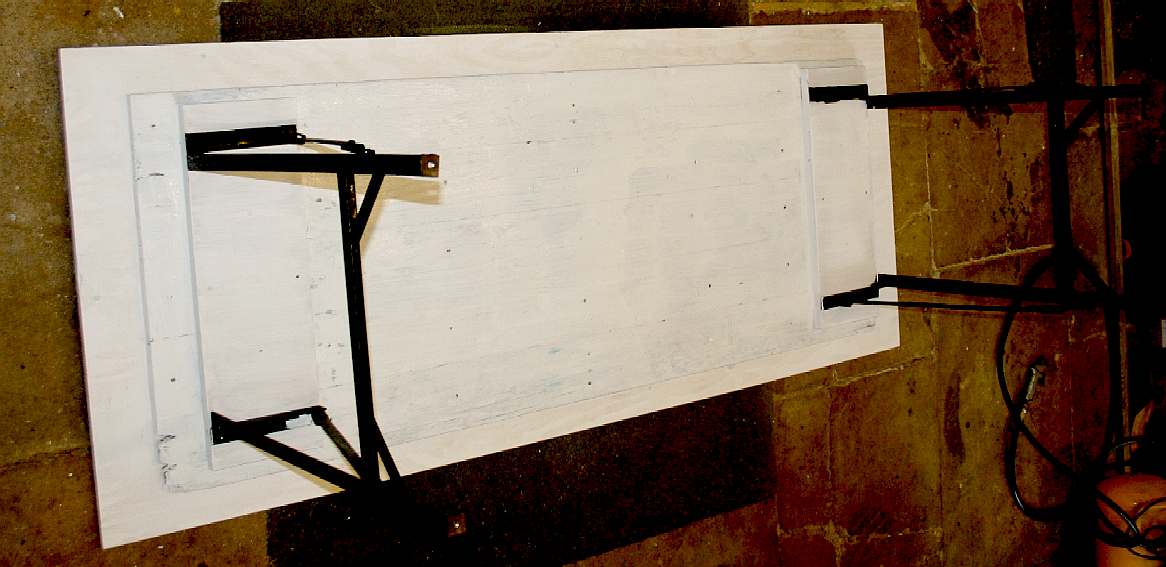
TABLE ASSEMBLY - The underside of the 18mm plywood was marked out with centerlines and leg mounting distances. The old pine planks were laid onto the plywood and clamped tight, then screwed to the plywood. On top of the pine, the 24mm x 610mm x 203mm hardwood ply pads were laid and the legs screwed through the pine planking to the 18mm spruce table top. Be careful to use the right length screws. They should be tapered steel wood screws, with the holes pre-drilled to avoid splitting the wood. This gives a stronger fixing than when screwing straight into the wood with modern chipboard screws with no taper.
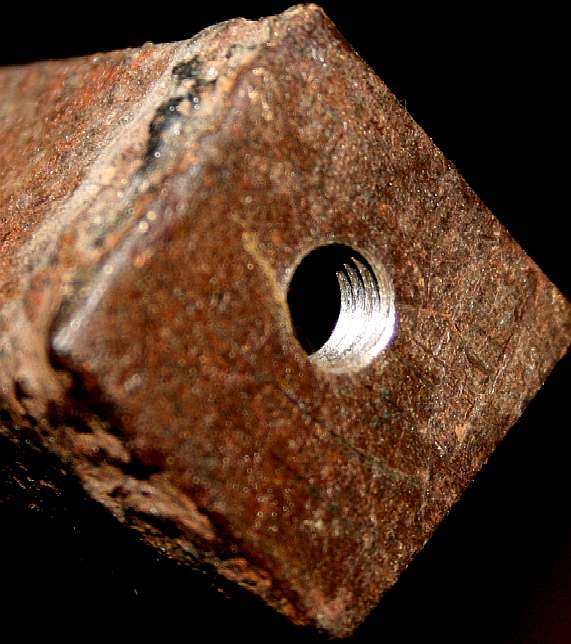
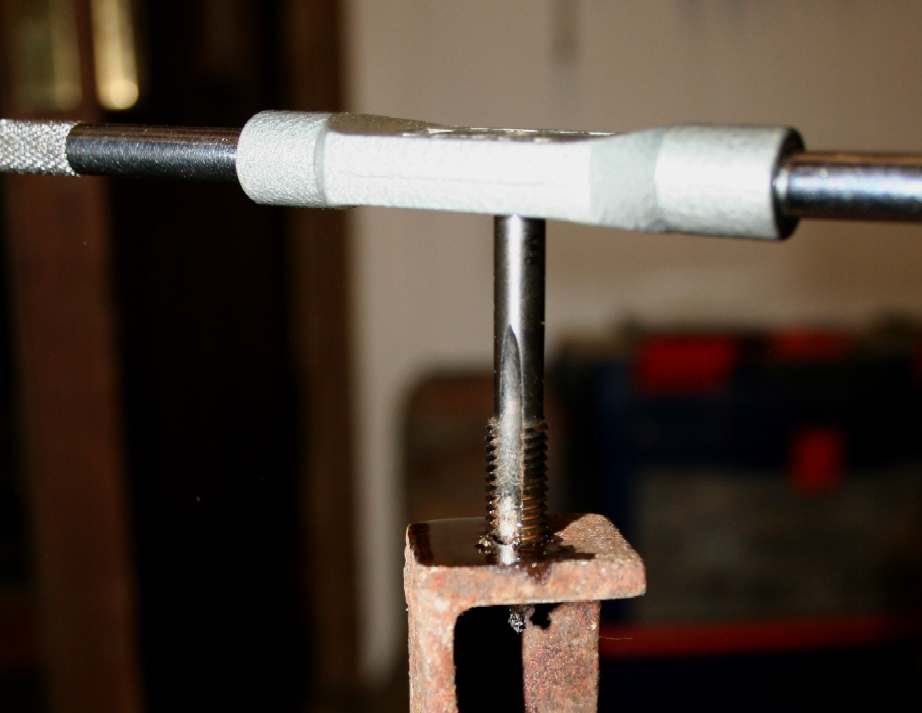
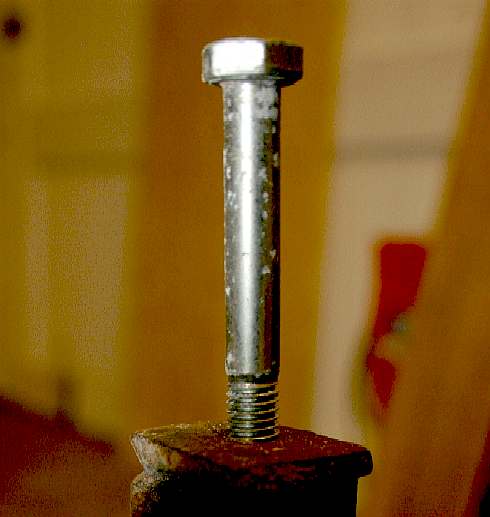
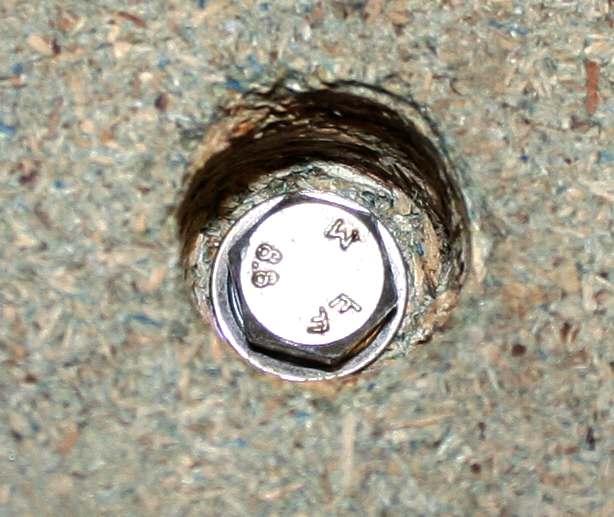
STURDY FEET - You may have noticed that the feet on the steel frames are only 1" x 1" (25mm x 25mm) steel, so will have a high point load on any floor. The way to spread load onto a floor and also increase stability, is to fit larger feet. The steel pads on each leg were thick enough to cut a respectable 8mm coarse metric thread. We'll need four long 8mm bolts and washers to secure the feet to the legs. An 8mm bolt has a 13mm head. you'll need a socket spanner set to tighten the bolts, that will be countersunk by at least 10mm below the feet - so that the bolts will not mark any flooring.
BIGFOOT - Earlier in the year a shipment of plywood had been delivered on chipboard and mdf supports. These low cost supports make ideal feet. Having cut them to length, the ends were tapered. Then two holes were drilled to match the spacing of the steel legs, and the composite feet were bolted to the steel legs to give a very stable table.
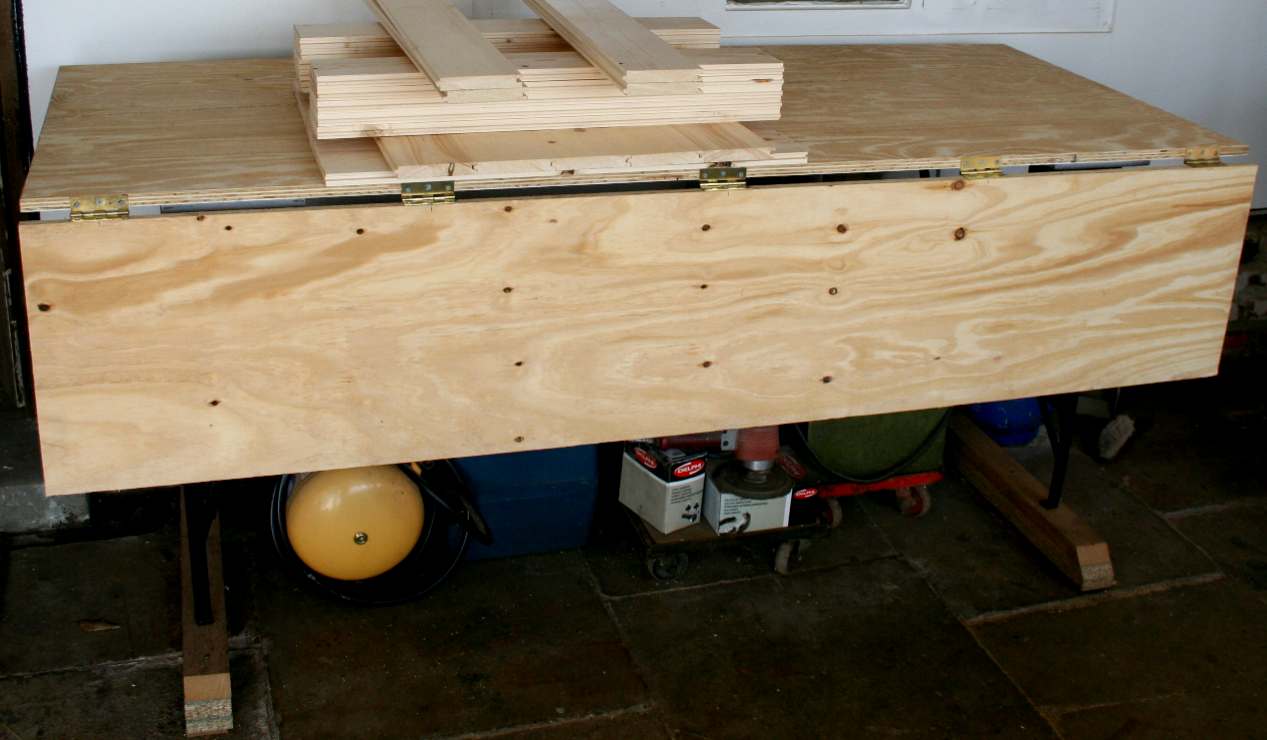
A USEFUL WORKBENCH - Well, there it is. A very versatile workbench made from recycled materials with just another £24 for a new plywood top and £3 for some steel hinges. The screws were already in stock, but had you bought them, would have cost another £2. Total cost including paints will be in the order of £40. You could not buy such a strong table for under £200 in the shops. It pays to DIY.
Don't forget to bevel all edges and sand off any rough grain before sealing the wood with a good preserver and water-proofer. The table is shown here carrying prepared softwood planks to be used to make solid pine cabinet doors. The leftover plywood will be used to make a DVD/Bluray cabinet.
WOODEN CLADDING - Treated timber can be used to weatherproof and insulate a building. This is Solar House, the former RAF hospital at Herstmonceux, undergoing a facelift in 2016. This is a timber framed building with timber facing inside, clad with timber on the outside. During WWII it was over-clad in corrugated iron. Over the years the iron covering had become rusty and was acting as a reverse radiator, transmitting the cold from the outside, rather effectively, to the inside. The original match boarding underneath was badly damaged and some had been removed between 1939 and 1942. The cure was to put in a plywood layer underneath the timber cladding with a breather membrane in between. When re-fitting the boarding, care must be taken to mark where the wooden frame is, so that fixing by nails will be effective. The replacement cladding will be coloured to match that above from roof repairs/improvements in 2006.
LINKS
http://www.disastercenter.com/guide/tsunami.html http://www.independent.co.uk/flooding-and-landslides-after-himalayan-tsunami-hits-india http://edition.cnn.com/2013/06/20/world/asia/india-floods http://rt.com/news/toll-dead-region-floods-633/ http://www.huffingtonpost.ca/2012/11/04/tsunami-flooding-storm-surge-vancouver-richmond-earthquake http://www.dailymail.co.uk/news/article-2174353/Japan-floods-2012 http://www.nws.noaa.gov/oh/hurricane/inland_flooding.html http://www.wickes.co.uk/
UK Forest Products Association Scottish Sustainable Construction Forum Passivhaus Trust- UK Passive House Organisation The Timber Research and Development Association Sustainable construction materials
QUNGDAO ENLIGHTENING ELECTROMECHANICAL CO LTD
A leading plywood and wooden pallet factory from china with a good reputation in Europe, America and Asia. QEE manufacture all kinds of all kinds of wooden pallet. Okoume plywood, Plywood for furniture usage, 1220 x 2440mm (all size) best quality plywood sheet, Packing Plywood .
http://qdlanting.en.alibaba.com
|
|
|
This website is Copyright © 2017. All rights reserved. All other trademarks are hereby acknowledged. Contact Us www.cherrymortgages.com |